
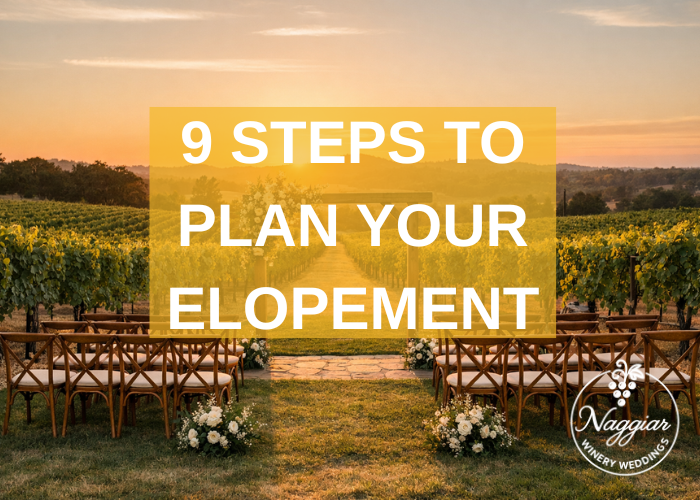
9 Steps to Plan Your Elopement
Quick Answers
Best planning window: 4–12 weeks (2 weeks is possible if you’re spicy + organized).
Ideal guest count: 0–20 for a true elopement vibe (micro-wedding if you’re closer to 20–75).
Most-forgotten items: marriage license timing, sunset photo buffer, and somewhere to eat after.
Most-worth-it spend: photographer + a location that doesn’t stress you out.
Elopements are the “just us” version of a wedding… with fewer group texts and more freedom. If you’re planning an elopement in the Sierra Foothills (Nevada County/Grass Valley area), you can keep it simple and make it feel special—without accidentally getting married in a parking lot (unless that’s your love language).
Step 1: Choose your elopement style (so decisions get easier)
Before you pick a date or book anything, decide what “elopement” means to you:
Common elopement formats
Just the two of you + officiant (classic, intimate, fast)
Tiny ceremony + dinner with a few guests (0–20 people)
Elopement ceremony + mini reception (often overlaps with micro weddings)
If you’re inviting more than ~20 people, you may be happier calling it a micro wedding—same intimacy, fewer logistics than a full-size wedding, and everyone still gets cake. If that sounds like you, start with micro wedding options at Naggiar Winery Weddings.
Step 2: Pick your date using the “golden hour + comfort” method
In the Sierra Foothills, timing matters. You want good light, comfortable temps, and fewer surprises.
A simple rule:
Spring + Fall: best balance of weather and golden hour
Summer: plan later in the day, hydrate like it’s your job
Winter: earlier sunsets + cozy vibe (and backup plans are non-negotiable)
Photo-friendly timing:
Plan your ceremony 60–90 minutes before sunset so you get vows and those warm golden-hour portraits.
Step 3: Lock in the location (the real MVP)
Your elopement location sets the tone, the photos, and how easy the day feels.
Location options couples love
Winery/vineyard settings: structured, beautiful, fewer “where do we stand?” moments
Nature spots: epic views, more permit/weather variables
A meaningful place: first date spot, family property, your backyard (underrated!)
If you want the vineyard look with an easy flow for ceremony + portraits + celebration, browse the vibe in the Naggiar Winery Weddings gallery.
Step 4: Understand the legal part (romantic, but also paperwork)
Not glamorous, but necessary (like flossing).
Your elopement legal checklist
Get your marriage license (check county requirements + appointments)
Confirm officiant rules for your location
Bring IDs, any required witnesses (if applicable), and a pen (yes, really)
Pro move: build a 10-minute “paperwork buffer” into your day so you’re not signing documents while someone is taking photos of your panic.
Step 5: Build a simple elopement timeline (that still feels luxe)
Here are three plug-and-play timelines. Pick one and adjust.
Timeline A: “Just Us” (2–4 hours)
Arrive + breathe (15 min)
First look (20 min)
Ceremony (10–20 min)
Portraits (60–90 min)
Toast + dessert/picnic (30 min)
Timeline B: Small Guests + Dinner (4–6 hours)
Arrival + photos (30–45 min)
Ceremony (15–20 min)
Family photos (20 min)
Couple portraits (45–60 min)
Dinner/reservation/celebration (2–3 hours)
Timeline C: Elopement that feels like a “tiny wedding” (6–8 hours)
Getting ready (60–90 min)
Ceremony (15–20 min)
Portraits (60–90 min)
Mini reception (2–3 hours)
Sunset photos (20–30 min)
If you want the “tiny wedding” version without building it from scratch, look at pricing and packages for Naggiar Winery Weddings to see what’s possible.
Step 6: Book the vendors that matter most
Elopements can be low-lift, but the right team makes them feel intentional.
Elopement vendor priority list
Photographer (your day lives here afterward)
Officiant (or a friend + legal check if allowed)
Hair & makeup (optional, but it photographs beautifully)
Florals (bouquet + boutonniere goes a long way)
Dinner plan (chef, restaurant buyout, private room, or a killer picnic)
Budget reality check (rough ranges):
Elopements vary widely, but couples commonly spend most on photography + location + celebration meal.
Step 7: Make it feel like YOU (this is the whole point)
Small day doesn’t mean small meaning.
Easy personalization ideas
Write private vows + read them twice (once privately, once at ceremony)
Bring one “ritual” (wine toast, letter exchange, playlist first dance)
Choose one splurge: fancy dinner, private chef, upgraded florals, or a luxury stay
Add a few guests only if they make you calmer, not more stressed
Step 8: Have a weather + backup plan (future-you says thanks)
In Grass Valley and the Sierra Foothills, weather is usually friendly… until it isn’t.
Backup plan essentials
A covered option (or indoor space)
Clear umbrellas (photo-friendly)
A warm layer that doesn’t ruin your outfit
A plan for hair if wind decides to audition for villain status
Step 9: Decide what happens after the “I do”
This is where elopements shine: you can do anything.
Post-ceremony ideas
A vineyard toast + sunset portraits
Dinner in Grass Valley or a nearby spot (Nevada City is also a favorite)
A cozy Airbnb weekend
A mini after-party with your closest people
If you’re considering a vineyard setting with a smooth, hosted flow, start with the contact page for Naggiar Winery Weddings and share your guest count + vibe.
Pro tips
Build a 30-minute buffer into everything (photos run long because joy happens).
Keep vows in your pocket as a backup (wind has no respect for stationery).
If you’re doing dinner after, book it before you buy accessories. Priorities.
Choose one “anchor moment” (sunset toast, first dance, private letters) so the day feels complete.
Common mistakes
Planning a ceremony too close to sunset (you’ll rush the best part).
Skipping permits/rules for outdoor locations (surprise fines aren’t romantic).
Forgetting where you’ll eat afterward (hanger is the enemy).
Over-inviting (if it starts feeling like a wedding-wedding, embrace micro wedding planning instead).
FAQs
Q: How far in advance should we plan an elopement?
A: Ideally 4–12 weeks for location + photographer availability. You can do 2–4 weeks if you keep it simple and stay flexible.
Q: Is an elopement the same as a micro wedding?
A: Not exactly. Elopements are typically 0–20 guests (often fewer). Micro weddings often land around 20–75 with a more traditional reception structure.
Q: What’s the most important vendor for an elopement?
A: Your photographer, because they preserve the story and help keep the day moving smoothly.
Q: What time of day is best for an elopement ceremony?
A: Late afternoon into golden hour is the sweet spot—great light, comfortable temps, and a natural celebration flow afterward.
Q: How do we make an elopement feel “special” without lots of guests?
A: Add one intentional upgrade: meaningful vows, a gorgeous setting, a great meal, a bouquet, or a sunset toast. Small day, big memories.